I was feeling super stressed out about being so busy and needing to reorganize my finances, so I did what any sane person would do: Concluded that the only logical solution was to completely tear apart my entire apartment, invest my whole paycheck into flowers and lace curtains and spend the next ten days decorating, shopping and making displays out of daisies.
LOL :) Ok, so maybe not the most conventional approach to freeing up time and paying down debt (and ok, ok, maybe not the most effective…) but I honestly feel a lot poorer calmer! And I feel like next weekend I’ll be 100% ready to reorganize my life… unless of course I find something else to organize around my apartment first ;)
So all joking aside, I’m actually really happy with how everything turned out and thought I’d share a few bits of my projects for anyone interested in shabby chic decor ♥
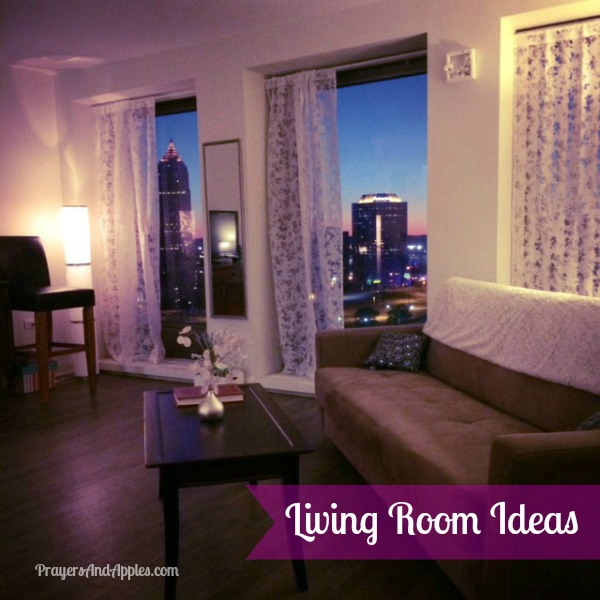
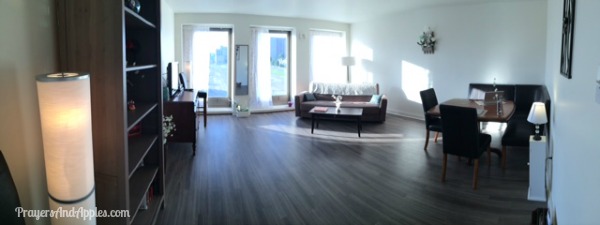
White is one of my absolute favorite colors and I love a simple, clean, clutter-free look, so I tried to let my wood floors take center stage and just accent with crisp white flowers and lace curtains.
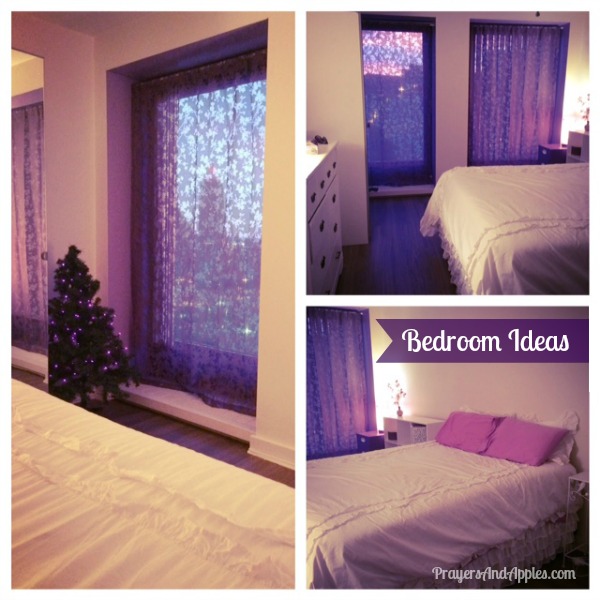
The first purple picture was taken from my bed and the second one (right above this) is my living room – in case the caption didn’t give it away ;)
It’s amazing how different lighting can make everything look too – I took the above picture at night and the panoramic shot, below, during the day:
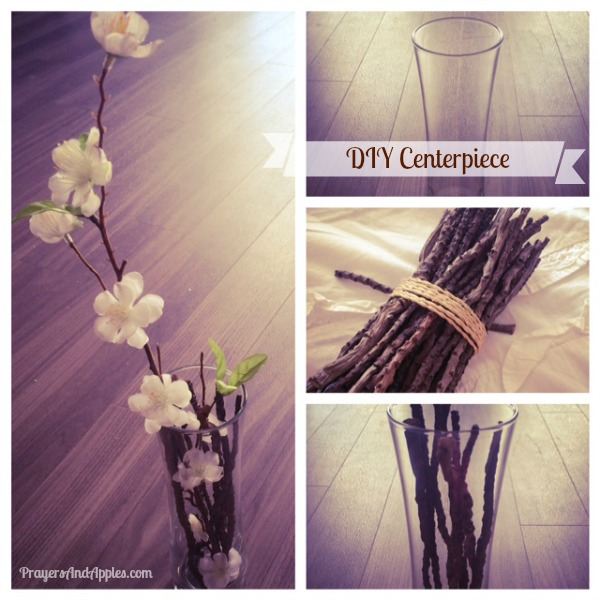
A lot of my work focused on details, like the centerpiece below:
I found most of my supplies at Jo-Ann Fabrics. I didn’t really go in with any kind of clear idea except: buy white flowers, and try to get some sparkly stuff. (The second goal is basically my shopping strategy for everything, so I found sparkly white branches in like two seconds flat.)
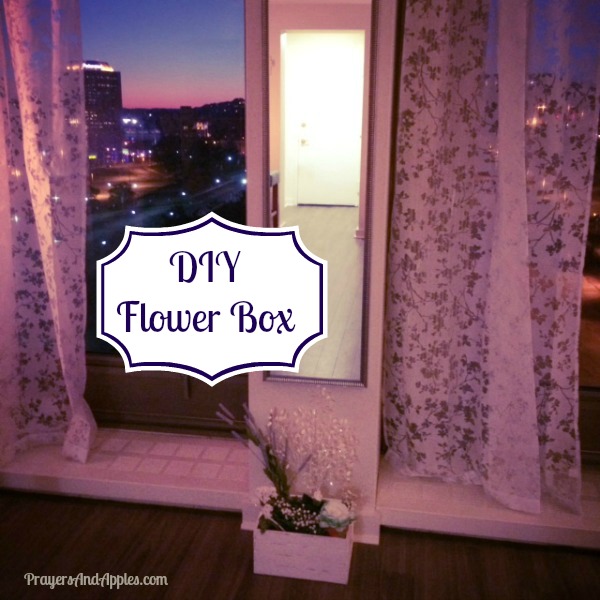
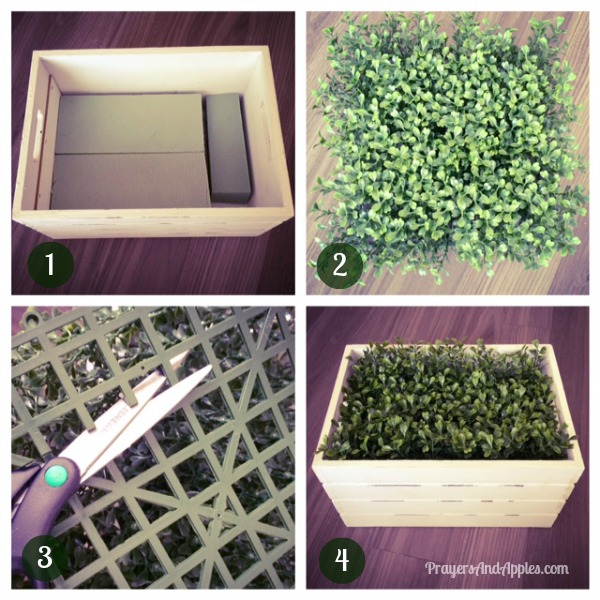
The flower box above kind of fell into place as I was shopping. I knew I wanted something on the ground, under the mirror – but I was originally thinking of building an actual flower box to go around the pillar. But then I thought, maybe that’s a lil crazy? And then I found that rustic-looking white box and thought: For $16 I can build a little garden with fake flowers and never have to worry about dirt (or little creatures living in the dirt and crawling out to get me at night – which was a legit fear of mine the further I progressed into thought…)
So yeah, 16 bucks and no imaginary woodland creatures? Sold.
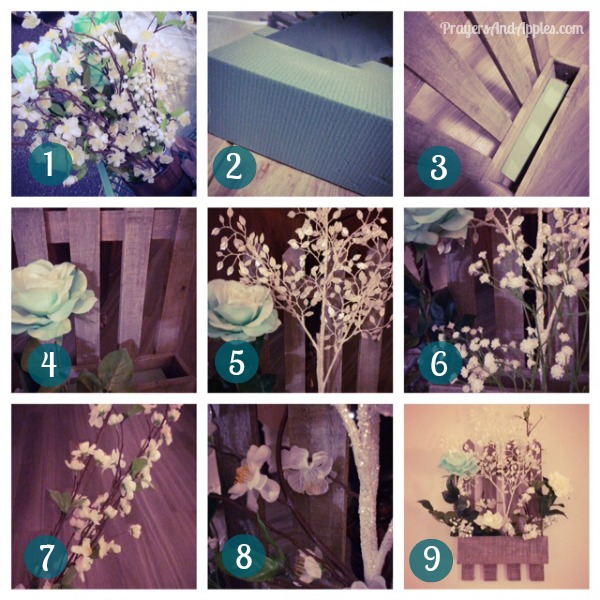
If you’re not a crafty person, don’t worry. This flower box was actually super simple. They sell foam blocks [1] for making flower arrangements and pre-made grass/moss, etc. [2]. Just throw in a few foam blocks, cut your greenery to fit [3] and voila! You’re halfway done!
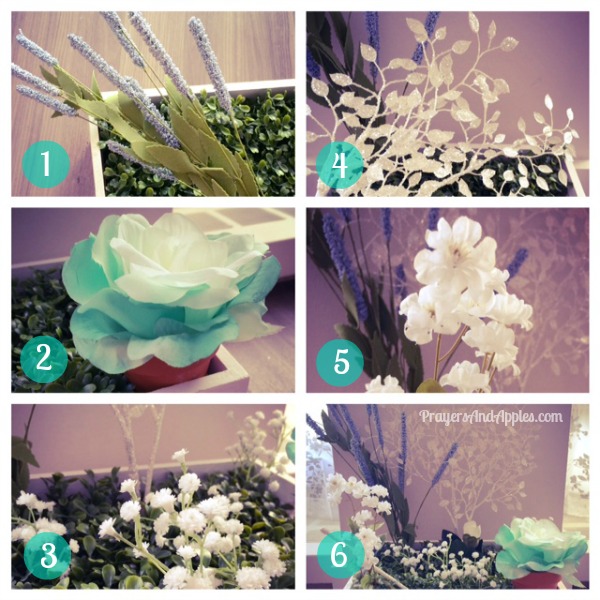
This next part is completely up to you. I found it easiest to place my colored flowers first [1, 2] and build everything else around those focal points. If you’re using anything sparkly – which you should obviously try to do when at all possible ;) – it’s good to place those items early on in the process [4] so you can build and fill [5, 6] around them.
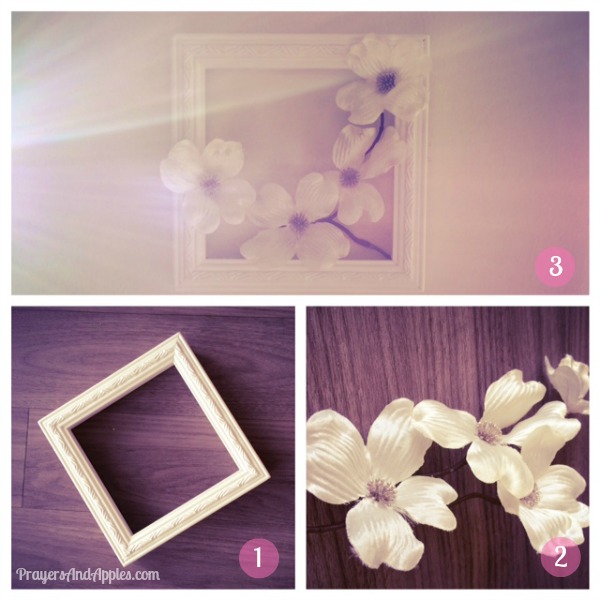
I kept my walls pretty sparse, but I wanted to have one or two decorations to keep things from looking too bare. I made the ‘picture’ above using a white picture frame [1] and left-over flowers [2]. I hung the frame and literally just set the flowers inside!
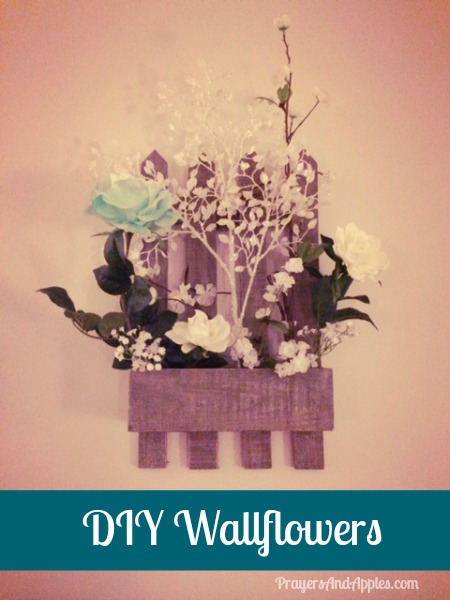
My wallflower display was definitely the most time consuming – but even that didn’t take more than 15 minutes!
Using the same foam blocks [2] from the flower box display, I padded the inside of a wood fence/box thing I found at the craft store (not really sure if it has a name?) and got to work [3]. I placed my color [4] and sparkly items [5] first and then filled in the gaps with tiny white flowers [6]. Using longer strands of flowers [7] – which were surprisingly easy to cut/break! – I wrapped a few branches around the fence posts [8] and called it a day!
Now the bedroom is actually what started this whole thing. I thought it’d be fun to ‘spruce things up with a little bit of color’ – and next thing you know, I’m painting everything I can see purple. (Luckily I only bought little containers of paint!)
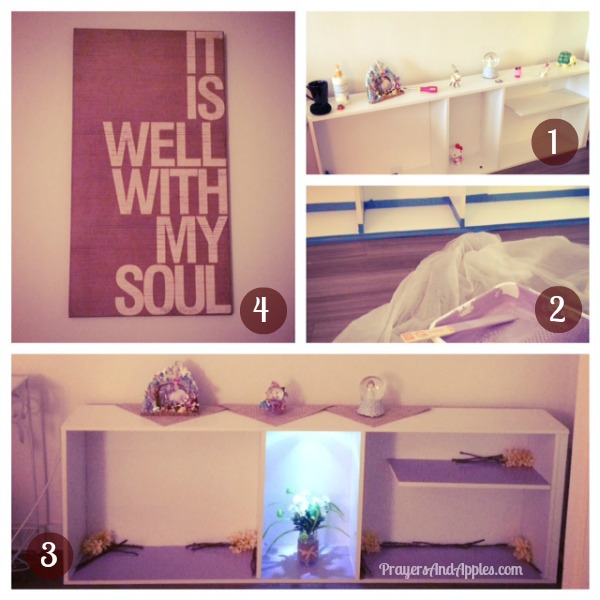
Even though it was a lot of work – painting isn’t near as fun as I thought it’d be! – I’m really happy with the outcome. In addition to painting around my windows (more on that in a sec) I did a few lil touch-ups here and there that really seemed to make a big difference. Take this old book case:
Like I said, I’m not big on clutter, but I have a handful of small things I like to keep out – and I’ve had this bookshelf forever [1]- so I needed a creative way to update its look. Enter some purple paint [2], extra flowers, branches and an adhesive LED light [3] and problem solved! :)
(For the story behind that picture, click here ♥)
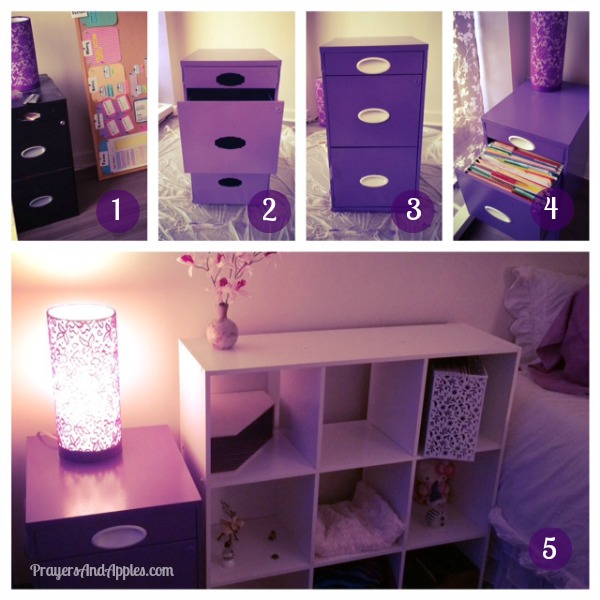
It turns out purple paint was also the solution to this black filing cabinet [1] that I’ve had forever and was constantly trying to hide. I popped out the handles [2], threw on some purple paint, spray painted the handles white [3], popped the handles back in and ta-da [4]! It finally looks like it belongs!
And the white cubbies next to it? Lowe’s + my dad + puppy dog eyes = a fully assembled storage system ♥ #noshame
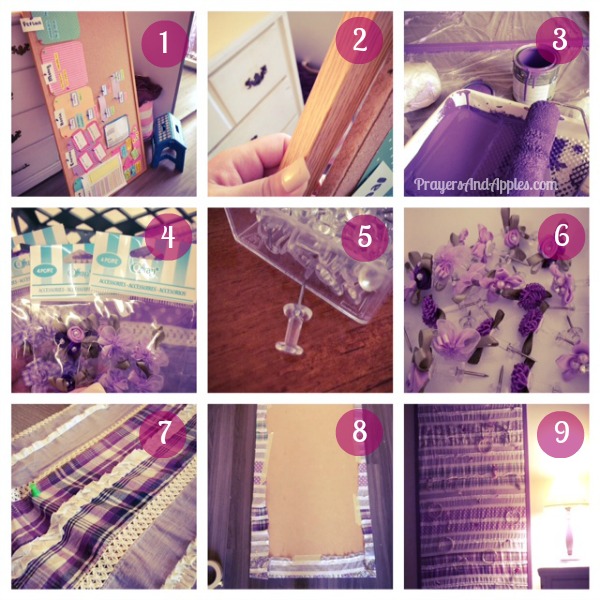
This next part didn’t photograph so well (I had a lot of trouble with the lighting and getting it all in one frame) but it’s actually one of the coolest parts of my bedroom. I took an old cork board [1], popped it out of its frame [2] and painted the frame purple [3]. (Now’s probably a good time to note I used three different shades of purple in my bedroom, so it has a little bit of dimension.)
While that was drying, I took little flowers [4] from the craft store (still not really sure what they’re supposed to be for?) and attached them to clear thumbtacks with double-sided tape [6]. I then covered the rest of the cork board with fabric – and totally masking-taped it to the back when I ran out of pushpins [8] – and popped it back into the frame. Using the flower thumbtacks, I hung up all of my earrings and necklaces – so now my dresser looks nice and neat and I have a fun splash of color on my wall! :)
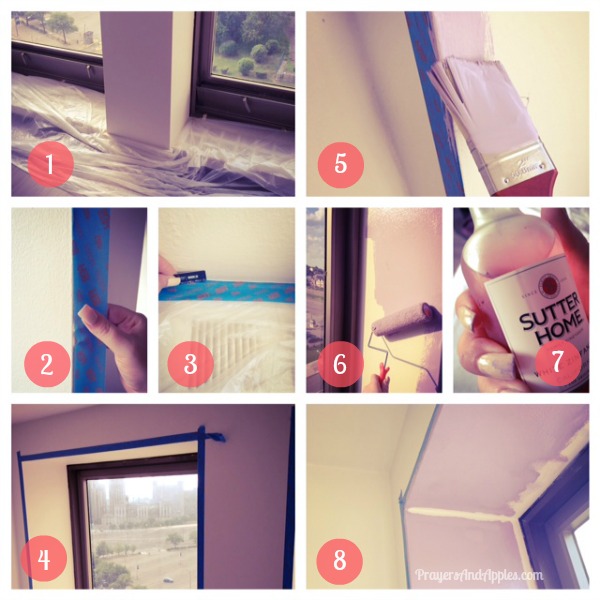
And now for the hardest part: actually painting. Like real, why-isn’t-this-as-fun-as-it-looks-on-TV painting.
Not gonna lie: At first I was all excited. That was around step [1] and about halfway through step [2]. My dad stressed the importance of making crisp lines with the blue painter’s tape, so I was super focused. And then like 10 minutes later I was super bored.
I read online that heat activates the painter’s tape – and that you should run your finger or an old credit card along the edges to prevent leaks [3] – so I sealed everything off and stepped back to admire my work [4]. Thirty-five minutes into my first big painting project and I had a bunch of blue tape on my walls and no color. Anywhere.
#notamused
Things did get a little better once I started actually painting. I ‘feathered’ some paint along the edges of the tape [5] (or at least that’s what the internet told me to do – I just kind of ran a paintbrush along the sides and hoped for the best).
Then I got to use the roller! Which was my favorite part [6]! Random fact: I use my right hand to paint with a brush but my left hand to paint with a roller. I feel like maybe that’s not normal?
After step [6] it was definitely time for step [7] – because after that I had to go back and fill in all of the spots the roller missed [8] with my paintbrush. Thank goodness for my CCR Pandora station! :)
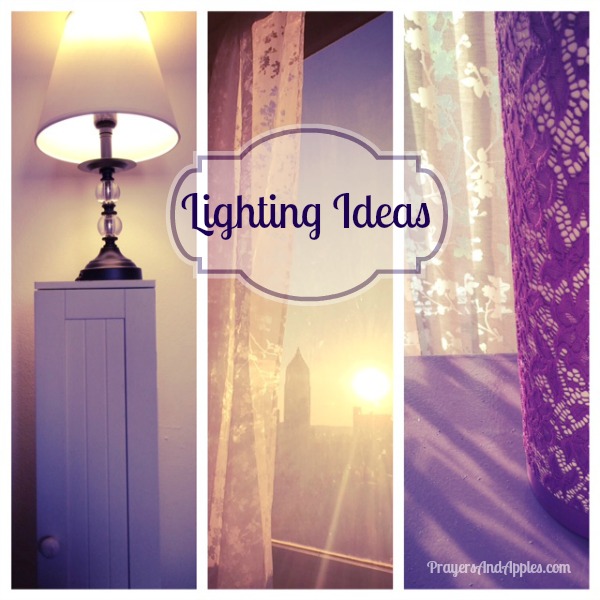
After my windows were done (once the paint dried, I added purple lace curtains in my bedroom and white lace curtains in the living room), I focused on lighting. I have half a dozen lamps (all different styles and shapes, like the two above) but my favorite source is natural light. That’s one of the reasons I love lace curtains – you get gorgeous sunlight during the day and (at least where I live!) beautiful city lights at night :)
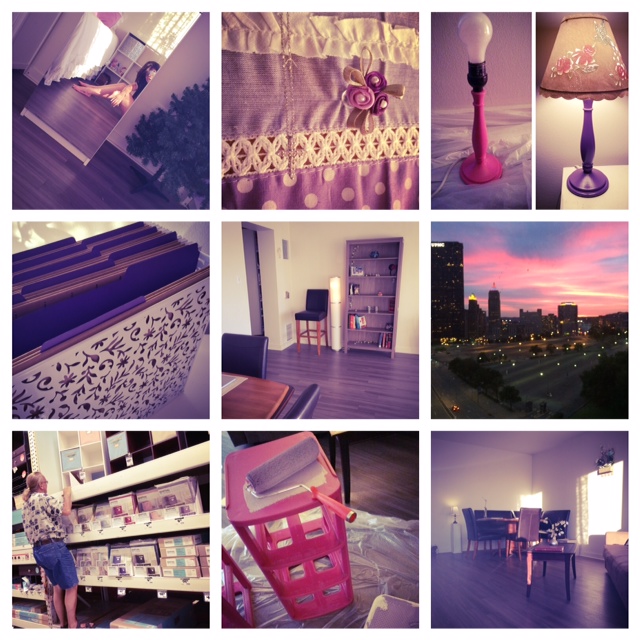
And of course, what room’s complete without a few strands of Christmas lights said no one ever? I have a little Christmas tree (top left picture, below) that I refuse to ever take down (seriously, this has been going on for years…) so I decorated it with tiny purple lights. I feel like it makes it look more mature ;) lol ♥
And with that, I leave you with the remaining randomness on my iPhone :) I hope some of my ideas gave you some ideas of your own – and wish you luck on your own decorating adventures! :)
Any shabby chic decorating ideas?
Stories from your own projects?




I love it…but am craving grapes now!!!
LOL! I know, there’s a lot of purple!! :)
What a pretty home you have with an AMAZING view! Okay, now come over to my place and help me decorate. I so want to spruce things up but I lack any kind of creative eye and I’m really liking what you did. I will be waiting on my patio…one of my favorite places and where I am currently spending my morning. :)
So good to be visiting you again.
xoxo
LOL :) Thank you! ♥ That’s the only thing I really, really miss: this is the first place I’ve ever lived without a patio! Looking forward to stopping over (at your blog!) soon :) xo
WOW! Everything looks amazing! I’m a huge fan of white and purple, too, so I approve of all your choices. :) You’re a DIY genius! I’m so in awe of anyone who can do that!
Thanks so much! This was my first time ever trying anything on this level – I’m really happy with how it turned out :)
I like what you did to the centerpiece, it’s cool and very elegant that will fit to a classic style living room. Thank you for sharing your wonderful ideas.